Friday, February 28, 2014

Flowers!


It's wonderful living in Phoenix this time of year - warm sunshine, blue skies, and flowers, lots and lots of gorgeous flowers!  The fruit trees are blossoming and the bougainvillea's in full bloom.  This is when I load the patio and yard with pots of flowers and enjoy them until they wither under the summer heat.  

If you're someplace where the flowers haven't quite made their comeback, take a tour of some great fiber flower creations I've come across recently.  And two of them have tutorials to brighten up the end of winter!

Ellen Lindner's Blessings Underfoot reminds me of warm late summer afternoons.  Be sure to look at this on her website where it's larger and easier to see all the great quilting lines she has going on in it. 


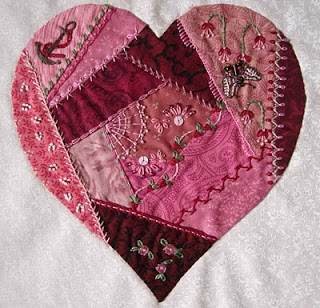
I love this gorgeous embroidered flower spray created by Penny Berens and her mother in the late 1950's or early 1960's.  It not only makes me think of spring, but of spring in a slower, gentler place.  You can read about it on her blog here.


If you're tired of waiting for real flowers to appear, start making your own!  Synnove Olava Gleditsch has this crochet flower pattern tutorial available on her blog here.  I can see a lot of these attached together for a spring pick-me-up scarf!


And Judy Hartman has a tutorial teaching us how to create this sweet little bouquet of daffodils.  Check it out here.


Happy Creating!  Deborah

Wednesday, February 26, 2014

Textured Knit Blankets


I showed a sneak preview of this last week and now it's finished!  The texture in this blanket comes from using different types and thicknesses of yarn - in fact, I think it's as much fun to shop for the different yarns as it is to knit it.  Before you pick out the yarns, decide if you want it to be a machine washable blanket or a handwashed blanket.  I didn't even think of that on the first one I made - I now have a lap blanket that needs to be handwashed.  That's good for strengthening arm muscles!

Materials:
*9 or 10 yarns in your chosen color scheme - mine for this blanket was turquoise and white.  I found this looks nicest using mainly worsted or sport weight yarns with a couple of thinner yarns and a novelty yarn that has some sparkle or other interesting feature
*size 10 1/2 needles - I like to use circular for this
*size G crochet hook

1.  Cast on 110 stitches.  Use one of the worsted weight yarns to begin and end with.

2.  Work in garter stitch - just knit stitches - for the whole blanket.  

This is a very free style blanket.  Knit as much as you want of each color.  It looks nice if you change up the amount you knit for each newly added yarn.  When you are done knitting with the first yarn, change yarns at an edge.  I try to change a yarn on the opposite side I started it on.


Another hint - weave in ends every so often.  If you wait to do them all until the end, it'll be very overwhelming!  Also, I know that knots are frowned upon in knitting and crochet, however I found that with the wear and tear blankets get it's a good idea to knot the two yarn ends you get when changing colors together before weaving the ends in.  I haven't had any blankets come apart when I've done this.

Additional hint - knit smaller amounts of the thinner yarns unless you want to have a very lacy blanket.  I don't generally knit more than an inch of the lace weight yarns and I intersperse them between the thicker yarns.  And I only knit three to five rows of the very thin white novelty yarn, adding it in for needed sparkle every so often.


3.  When you have the blanket as long as you want, cast off and weave in the tail.  This one is a baby blanket - I made it about 40 inches long.

4.  Using one of the worsted weight yarns, attach near a corner (but not in the corner) and evenly single crochet around the entire blanket, making three single crochets in each corner (on this row and on rows 2 and 3, also).  Join to the first single crochet with a slip stitch.  Chain one and single crochet around the entire blanket again, using one of the other colors of worsted weight.  Don't cut off the first color.  When the second row is done, cut off that yarn and complete a third row with the first color of yarn.  Fasten off and weave in any loose ends that are left.


Happy Creating!  Deborah

Monday, February 24, 2014

Knit Washcloths - Heart


I'm on a mission to make a rainbow of knit washcloths!  I finished the first one, a heart, and have the pattern here for you today.  If you're a beginning knitter (like me!), this is really easy!  All you have to know is how to do a knit stitch, how to do a purl stitch, and how to count.  If you want to make a rainbow, like I am, you'll also need to know how to do a single crochet stitch - not hard at all.  When I make the next washcloth in the series, I'll add a tutorial on how to do that.

Materials:
*Knitpicks Cotlin cotton/linen blend yarn in Swan and Moroccan Red
*size 4 (3.5mm) knitting needles
*size E crochet hook

1.  With Swan, cast on 40 stitches.

2.  Work rows 1 - 7 in garter stitch (just knit stitch).

3.  Begin stockinette stitch.  For rows 8, 10, and 12, knit 4 stitches,  purl for 32 stitches, and knit the last 4 stitches.  Work rows 9 and 11 in garter stitch.  

4.  Beginning with row 13, you can work from the chart.  The chart shows the uneven rows through row 47.  For the even rows, work 4 knit stitches, purl for 32 stitches, and knit the last 4 stitches.

Row 13 - knit 20 stitches, purl 1 stitch, knit 19 stitches
Row 15 - knit 19 stitches, purl 3 stitches, knit 18 stitches
Row 17 - knit 18 stitches, purl 5 stitches, knit 17 stitches
Row 19 - knit 16 stitches, purl 9 stitches, knit 15 stitches
Row 21 - knit 15 stitches, purl 11 stitches, knit 14 stitches
Row 23 - knit 14 stitches, purl 13 stitches, knit 13 stitches
Row 25 - knit 13 stitches, purl 15 stitches, knit 12 stitches
Row 27 - knit 13 stitches, purl 7 stitches, knit 1 stitch, purl 7 stitches, knit 12 stitches
Row 29 - knit 12 stitches, purl 7 stitches, knit 3 stitches, purl 7 stitches, knit 11 stitches
Row 31 - knit 12 stitches, purl 6 stitches, knit 5 stitches, purl 6 stitches, knit 11 stitches
Row 33 - knit 11 stitches, purl 6 stitches, knit 7 stitches, purl 6 stitches, knit 10 stitches
Row 35 - knit 11 stitches, purl 6 stitches, knit 3 stitches, purl 1 stitch, knit 3 stitches, purl 6 stitches, knit 10 stitches
Row 37 - knit 11 stitches, purl 7 stitches, knit 2 stitches, purl 1 stitch, knit 2 stitches, purl 7 stitches, knit 10 stitches
Row 39 - knit 11 stitches, purl 19 stitches, knit 10 stitches
Row 41 - Repeat row 39
Row 43 - knit 12 stitches, purl 8 stitches, knit 1 stitch, purl 8 stitches, knit 11 stitches
Row 45 - knit 13 stitches, purl 6 stitches, knit 3 stitches, purl 6 stitches, knit 12 stitches
Row 47 - knit 14 stitches, purl 4 stitches, knit 5 stitches, purl 4 stitches, knit 13 stitches


5.  Rows 48, 50, 52, 54, 56 - knit 4 stitches, purl 32 stitches, knit 4 stitches.
     Rows 49, 51, 53, 55, and rows 57 - 63, work in garter stitch.

6.  Cast off.


7.  Join red yarn and single crochet evenly around the washcloth, putting 3 single crochets in each corner.  Join to first single crochet with a slip stitch.  Chain 1 and add a second row of single crochet, again putting 3 stitches in each corner.  Finish off.


Happy Creating!  Deborah

Friday, February 21, 2014

Knitpicks Tutorials

Okay -- I love Knitpicks yarn and thought I'd looked at everything on their website.  I mean, I'm on there a few times a week (and no, I'm not affiliated with them) so how could I miss something as obvious as a large button that says "Tutorials"?!  Well, it's there and based on the number of tutorials available, it looks like it's been there for ages!


So, if you're like me and this is all new to you, check out the humongous list of video tutorials they make available for free.  And they cover everything from tatting, to crochet and knitting!  I'm going to try something fun with what I learned from watching the video on adding beads to your knitting, using a crochet hook - it looks very doable!  That video is here and the full list is on this page.

Happy Creating!  Deborah

Wednesday, February 19, 2014

In Progress ....


This is one of those "in progress" weeks.  I'm almost finished with my current knitting project - I'll give you the full details next week!  I'm almost finished writing my master's thesis and then on to polishing it up!  The weather's been gorgeous, the flowers are blooming .... life is in progress.

Happy Creating!  Deborah

Friday, February 14, 2014

Valentine's Day

Happy Valentine's Day!  When I walked out into the yard earlier this week, look what I found!  It seemed a good omen .... .


...and here are more hearts I've come across:


The free pattern for this darling hat by Pinko Knitter is here.


Still haven't tried tatting!  This heart pattern is by Anne Bruvold and is here.  The heart above was done by Brigette on her blog Tatting, Beading and Needlework.


And this gorgeous crazy quilt heart was created by Susan for her blog Seasons From My Window.  

Happy Creating!  Deborah

Monday, February 10, 2014

Mecha Cowl


I put a moratorium on knitting anymore scarves or cowls for this season .... and then I walked into a yarn shop and discovered Malabrigo's Mecha.  In a color that reminded me of summer and dyeing with indigo.  So here is one last cowl!  Not that I'll need it any time soon - I got out of Portland right before the snow and ice storms hit and am back enjoying sun, flowers, and blue skies in Arizona!


Mecha means "single ply" in Uruguayan Spanish and is a wonderfully soft, squishy superwash merino wool.  It's bulky, but not super bulky- just right.  This colorway is named "green gray" - the green isn't obvious, though.  It's more the fleeting hints of green you see as indigo dyed fiber is oxidizing to blue.  


Materials:
*2 balls Malabrigo Mecha - you'll have about a 1/2 ball left over
*size 10 1/2 (6.5mm) needles

Cast on 100 stitches.  Work in garter stitch for 12 rows.  Work in stockinette stitch for 6 inches.  Work 12 more rows of garter stitch and finish off.

That's it!  Pretty easy!  If you knitted it in the round, you're done - otherwise just leave a long tail when you cut off your yarn and use it to seam the two ends of the cowl together.


Happy Creating!  Deborah

Friday, February 7, 2014

Friday Inspiration - Fiber Art Classes

If you're planning your escape from winter or just daydreaming about it, here are some fiber arts classes this spring and summer to drool over!


The Pacific Northwest Art School on Puget Sound's Whidbey Island has a whole slate of fun sounding classes coming up.  Nuno, hat making, shibori, dyeing, screen print ... I think I could live there!  And India Flint will be holding an EcoColour workshop in May.  Check out all the classes here.


The John C. Campbell Folk School in Brasstown, North Carolina offers an amazing variety of classes and workshops ... knitting, weaving, spinning, beading, quilting, embroidery, and more.  The list begins here.


If you're in the middle part of the country, the Fine Line Creative Arts Center in St. Charles, Illinois has workshops in fabric/surface design, felting, braiding, knitting/crochet, weaving, tatting and spinning.  See the classes here.


To check out even more fiber art workshops, here's a list of art/craft schools and centers around the country.

Happy Creating!  Deborah

Wednesday, February 5, 2014

Valentine Wool Applique Mat


I got hooked on working with wool applique a year ago last fall and now have several projects planned for this year.  Here's the first!  It's a Valentine's Day themed wool mat that uses a simple blanket stitch and works up pretty quickly.  

Materials:
*2 9x12 inch pieces of tan wool
*small amounts of red, pink, cream, and green wool
*perle embroidery thread - sizes 5 and 12
*8 buttons
*applique patterns (print in landscape) found here

1.  Cut four large hearts and four small hearts from the red wool, four large hearts and four small hearts from the pink wool, and four leaves from the green wool.  Pin the large hearts and leaves on one piece of the tan wool and sew in place with the size 12 perle thread and a blanket stitch.  Sew a short leaf vein on each leaf using an outline stitch.  Pin small hearts on the large hearts and sew in place, also with a blanket stitch.


2.  Cut a flower from the cream felt and a small circle from the pink felt.  Sew in place using a blanket stitch.


3.  Sew a button onto the center of each heart.


4.  Pin the second piece of tan wool to the front and sew together with the size 5 perle thread, using a blanket stitch.


Happy Creating!  Deborah

Monday, February 3, 2014

Valentine Applique Sweatshirt


It's February and Valentine's Day is quickly approaching!  And all those Valentine ideas I had after Christmas .... yeah, it seemed like there were eons to work on them, but not so much!  I've managed a couple of them, though.

This sweatshirt goes together fairly quickly.  The image is from Graphics Fairy and is found here.  I added a crocheted edging after finishing the heart's edges, but if you don't crochet, it'll look great even without it.

Materials:
*sweatshirt
*dove image from Graphics Fairy
*photo fabric and Steam-a-Seam II or a photo fabric with iron-on adhesive already on the back
*size 5 perle thread
*size 10 crochet thread and a size 7 crochet hook (optional)

1.  Print out the dove image.  Cut out in a heart shape - I made a paper heart first to get the right size and then traced it onto the fabric with the dove image.

2.  Iron the heart onto the sweatshirt.

3.  Sew around the edge of the heart with the perle thread, using a blanket stitch and making the stitches close together.  If you use a photo fabric that has an iron on backing, it might be heavy enough that pulling the needle through is difficult.  If this happens to me, I use small pliers to pull the needle.


4.  Attach the crochet thread to the top dip of the heart.  Chain 1 and then single crochet in each blanket stitch, putting two single crochets in each stitch on either side of the heart's point.  Join to the chain 1 stitch.  Chain 4, skip the next stitch.  Continue in this pattern around the heart.  At the point of the heart, don't skip a stitch before doing your next chain 4, to give an extra chain 4.  Fasten off.


Happy Creating!  Deborah