A very Merry Christmas from my family to yours!
See you in January - Deborah
This day before the winter solstice dawned clear and frosty. I always love this solstice - it means that the sun will begin making more of an appearance until we're back to warm summer days! To keep some sun in your day, here are some fun and inspiring pieces.
Gay Huntley's embroidered and beaded sun is amazing! I have always loved heavy beading and have made many plans to work some - maybe in the new year. See it on her website here.
A Tattered Canvas has this gorgeous tatted sun that's used as a necklace pendant. Hmmm ... tatting, another something I've been planning on trying. Maybe 2014 will be the year of the new fiber techniques! The complete instructions are here.
And Riikka has the instructions for this fun sun and clouds on her website here.
Happy Creating! Deborah
If you need a last minute holiday outfit, this Christmas tree applique works up really quickly, but doesn't look like it! I put it on a knit dress for little c - it'd look great on a sweatshirt or tee, also.
Materials:
*piece of clothing
*small amount of faux suede in green and red
*small amount of scrap fabric
*Steam-a-Seam II Lite - optional
*embroidery floss or size 8 perle cotton
*gems
*sequin star and two beads
*wash proof glue - I like Aleene's Jewel-It
*pattern found here - print it out in landscape
1. Print out pattern and use to cut out a tree from the scrap fabric. You can either pin it on or use Steam-a-Seam to attach it. I like using the Steam-a-Seam on jersey fabric - it helps stabilize it a bit.
2. Sew around the edges of the tree using a blanket stitch.
3. Attach the star with two beads - bring the needle up through the fabric and the star, through both beads and back down through the bottom bead, the star and the fabric.
4. Attach the gems using a washable glue. If your fabric is on the thinner side, first put a piece of waxed paper inside to protect the back from any glue that may seep through. Let dry overnight before moving it.
Happy Creating! Deborah
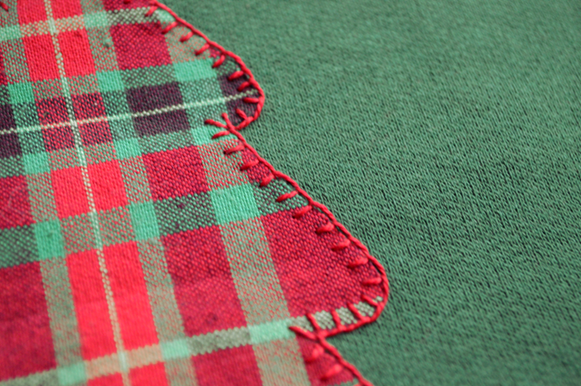
Pillow number two is done! We'll see if pillows number three and four follow or are off until next year!
Materials:
*two pieces of plaid fabric: one that is 22 by 22 inches and one that is 22 by 23 inches
*small piece of white faux suede material
*small piece of green faux suede material
*size 5 ecru perle embroidery cotton
*size 8 red perle embroidery cotton
*22 inch invisible zipper
*20 inch pillow form
*pattern found here
1. Print off the patterns (print in landscape) and cut out. Cut one dove from the white fabric and two holly leaves from the green. Lay the pieces out on the 22 x 22 inch piece of fabric. Remove the dove and pin on the leaves.
2. Attach the leaves using a blanket stitch and the ecru cotton. Sew a center line on each leave using a running stitch.
3. Pin dove with beak just over leaves and sew in place with ecru cotton using a blanket stitch. Sew the bottom of the wing in a running stitch. Add three stitches for the eye.
4. To embroidery berries, use red cotton. Using an outline stitch, make one stitch where you want the center of the berry to be. Then sew around that stitch (still using an outline stitch) in an expanding spiral until the berry is the size you want it to be.
5. See this post for how to insert the zipper, sew the front to the back, and finish.
Happy Creating! Deborah
In case you're in the need of a fiber art book as a gift or to put on your wish list, here are three of my favorite I purchased this year.
I just bought Barbara Parry's new book Adventures in Yarn Farming and can hardly put it down! Her adventures in beginning raising sheep are fascinating to read - especially since this is a direction I would like to go. And interspersed through out are yarn projects ... knitting, spinning, weaving. The photography is gorgeous! You can take a look at it on Amazon here.
I'd been looking for a book like Sheila Smith's felt fabric designs for years! This is a great resource for anyone from beginners to more experienced felters. Here are a few sample photos:
I bought Christen Brown's Embroidered & Embellished last summer while I was working on embellished embroidery pieces - it's a great resource when you just can't think of another different stitch to add in. And it's wonderful eye candy to drool over! You can look inside on Amazon here.
Happy Creating! Deborah
Here's a quick little holiday pin to work on while you stay cozy this cold weekend. Heat up a nice cup of something hot before beginning!
Materials:
*small pieces of green and sparkly white felt
*assorted beads
*pin back
*green embroidery floss
*beading thread
*embroidery and beading needles
*pattern found here - print in landscape
Before beginning, read through this past post on making beaded felt pins.
1. Cut one tree and two backing pieces.
2. Using a blanket stitch and two strands of green embroidery floss, attach tree to one piece of the background.
3. Decorate tree with small beads.
4. Sew pin back on right side of the other backing piece.
5. Sew backing pieces together, using a blanket stitch and two strands of green embroidery floss.
6. Outline the tree with beads.
Happy Creating! Deborah
Well, Thanksgiving's done and now the push is on for getting all my Christmas preparations finished. One of my goals this year was to make Christmas-themed appliqued pillows - here's one finished! It uses the same snowflake pattern as the snowflake ornament posted about here.
Materials:
*two pieces of plaid fabric: one that is 22 by 22 inches and one that is 22 by 23 inches
*small piece of white faux suede material
*size 5 ecru perle embroidery cotton
*22 inch invisible zipper
*20 inch pillow form
*snowflake pattern found here
1. Print off the snowflake pattern and cut them out. Cut out two large snowflakes from the faux suede and one small snowflake. Pin to the 22 x 22 inch piece of fabric and sew on using a blanket stitch.
2. Take the 22 x 23 inch piece of fabric and cut it in half so that you have two 22 x 11.5 inch pieces. Open up the zipper and place the right side of the zipper to the right side of one piece of fabric, lining up the zipper tape edge with the fabric edge and pointing the teeth toward the fabric. Line the top zipper stops up about 1 inch below the top of the fabric. Repeat with the other side of the zipper and the other piece of fabric. Baste in, test to see your zipper is in right, and sew in place using an invisible zipper foot. See this past post for a more detailed tutorial on sewing with invisible zippers. The instructions for this pillow will differ a little, but the basic steps are the same.
3. Tack the zipper on the bottom about 1 inch up from the bottom of the fabric and trim off the excess tape.
4. Pin the right sides of the pillow fabric together, making sure to line up the edges on the top and bottom of the zipper piece.
5. Sew together with a 1/4 inch seam. Trim corners, turn and press.
6. Hand sew the gaps above and below the zipper closed with a matching color of thread.
7. Top stitch all the way around the edge of the pillow, in a matching or contrasting thread 5/8 inches from the edge.
On to the next pillow!
Happy Creating! Deborah